|
|
|
|
|


|
|
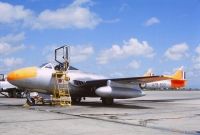
Photos of Royal Australian Air Force
|
|
ID NUMBERS
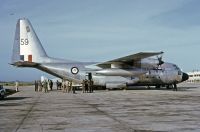
REG: A12-124
MSN:
PHOTOGRAPHER
|
|
|
|
 |
|
|
Remark |
Photographer |
A12-124 |
|
|
|
ID NUMBERS
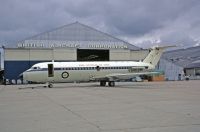
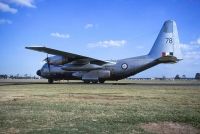
REG: A97-159
MSN:
PHOTOGRAPHER
Clint Groves   (Seniority Date: Oct 2 2007)
|
|
|
|
 |
|
|
Remark |
Photographer |
A97-159 |
|
|
|
ID NUMBERS
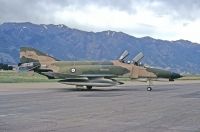
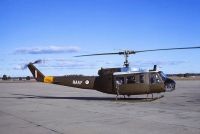
REG: 69-7216
MSN:
PHOTOGRAPHER
|
|
|
|
 |
|
|
Remark |
Photographer |
69-7216 |
|
|
|
ID NUMBERS
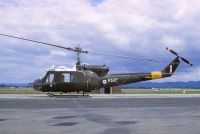
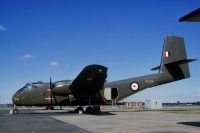
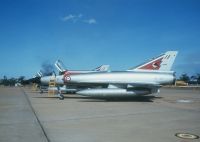
REG: A12-125
MSN:
PHOTOGRAPHER
Clint Groves
(Seniority Date: Oct 2 2007)
|
|
|
|
 |
|
|
Remark |
Photographer |
A12-125 a pre delivery shot at the Hurn factory. |
|
|
|
ID NUMBERS
REG: A2-715
MSN:
PHOTOGRAPHER
David Lawrence Collection
(Seniority Date: Oct 22 2011)
|
|
|
|
 |
|
|
Remark |
Photographer |
A2-715 |
|
|
|
ID NUMBERS
REG: A79-802
MSN:
PHOTOGRAPHER
David Lawrence Collection
(Seniority Date: Oct 22 2011)
|
|
|
|
 |
|
|
Remark |
Photographer |
A79-802 |
|
|
|
ID NUMBERS
REG: A97-178
MSN:
PHOTOGRAPHER
David Lawrence Collection
(Seniority Date: Oct 22 2011)
|
|
|
|
 |
|
|
Remark |
Photographer |
A97-178 |
|
|
|
ID NUMBERS
REG: A73-45
MSN:
PHOTOGRAPHER
David Lawrence Collection
(Seniority Date: Oct 22 2011)
|
|
|
|
 |
|
|
Remark |
Photographer |
A73-45 on the Mascot fire dump withdrawn from service JAN 1959 |
|
|
|
ID NUMBERS
REG: A65-69
MSN:
PHOTOGRAPHER
David Lawrence Collection
(Seniority Date: Oct 22 2011)
|
|
|
|
 |
|
|
Remark |
Photographer |
A65-69 |
|
|
|
ID NUMBERS
REG: A20-10
MSN:
PHOTOGRAPHER
David Lawrence Collection
(Seniority Date: Oct 22 2011)
|
|
|
|
 |
|
|
Remark |
Photographer |
A20-10 |
|
|
|
ID NUMBERS
REG: 506
MSN:
PHOTOGRAPHER
David Lawrence Collection
(Seniority Date: Oct 22 2011)
|
|
|
|
 |
|
|
Remark |
Photographer |
506 |
|
|
|
ID NUMBERS
REG: A4-234
MSN:
PHOTOGRAPHER
David Lawrence Collection
(Seniority Date: Oct 22 2011)
|
|
|
|
 |
|
|
Remark |
Photographer |
A4-234 |
|
|
|
ID NUMBERS
REG: A3-33
MSN:
PHOTOGRAPHER
Alphie Tufnell
(Seniority Date: Oct 2 2007)
|
|
|
|
 |
|
|
Remark |
Photographer |
A3-33 |
|
|
|
|
|
|
|
|
|
|
|
|